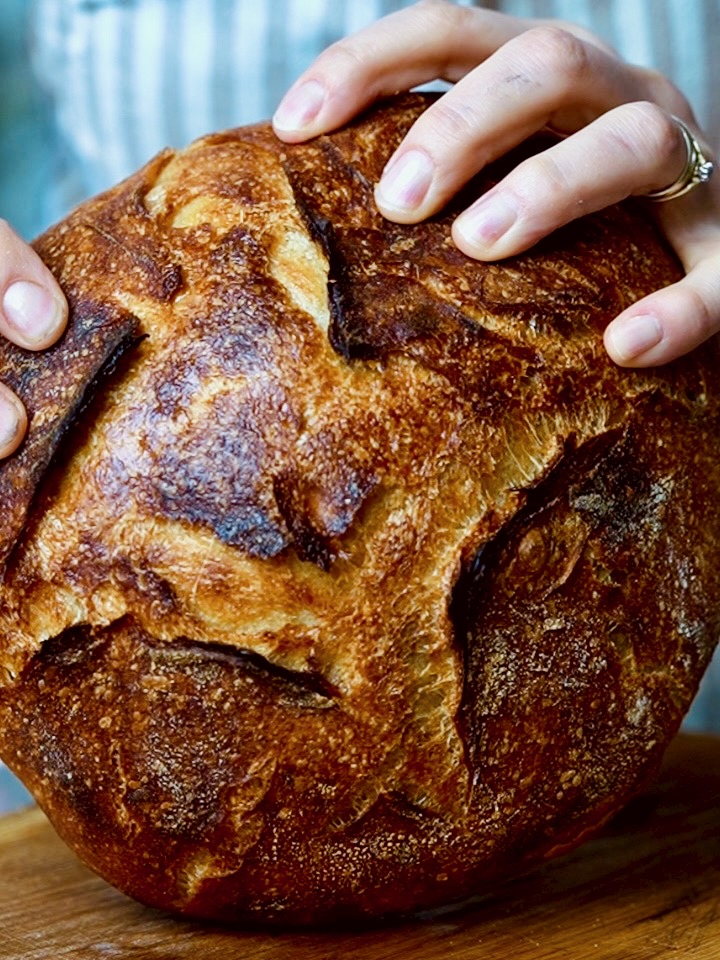
Croissant meets sourdough – and it’s love at first bite.
Croissant sourdough bread is the perfect combination of two worlds: crispy and flaky on the outside like a croissant, aromatic and light on the inside like a classic sourdough loaf. The addition of ice-cold butter creates a unique texture that you won’t find in any other bread.
If you want to take your sourdough to the next level, this bread is just the thing. Perfect for special occasions – or simply because you want to treat yourself to something really special.
This recipe shows you, step by step, how you can easily bake your own croissant-style sourdough bread that’s sure to impress.
Ingredients for 2 sourdough croissants
Before you start, here are the ingredients you’ll need for this recipe. The exact quantities are listed in the recipe card at the end of the article!
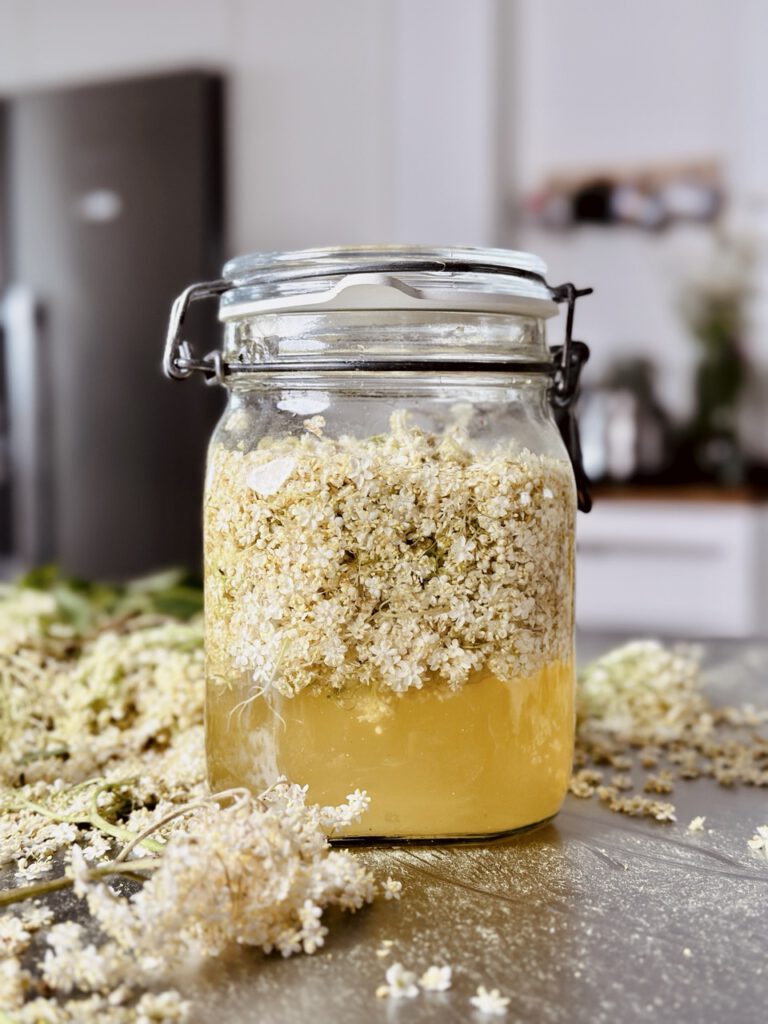
Sourdough starter
Wheat flour with at least 12% protein: gives the pre-dough structure and promotes elasticity – you need a high-protein flour. The recipe card lists the one I use.
Wholemeal wheat flour: adds complexity and depth of flavour
Water: lukewarm, aids fermentation
Mature sourdough starter: active and bubbly
Main dough
Wheat flour (min. 12% protein): provides volume and structure, such as Manitoba Type 00
flour Wholemeal wheat flour: adds extra flavour
Water: main source of moisture, lukewarm and partly reserved
Salt: balances flavour and fermentation
Matured pre-dough: gives the main dough its rising power
Ice-cold butter: finely grated, for the buttery croissant texture
Preparation
1. Make the
starter: Mix all the ingredients for the starter together and leave to rest in a sealed container at around 25 °C for 5 hours.
Tip: The starter is ready when it forms bubbles and has a pleasant, mildly sour smell.
2. Autolysis Mix
the flour with 650 g of water in a bowl until there are no dry patches left. Cover the bowl and leave to rest for 2 hours.
Tip: This stage improves the dough’s texture and makes the bread particularly springy.
3. Mix
the main dough Add the pre-ferment, the salt and the remaining water (approx. 20 g, or less if necessary) to the autolyse mixture. Work it in with your hands, leave to rest for 10 minutes, then stretch and fold the dough in the bowl for 2–3 minutes until it is smooth and cohesive.
Tip: When the dough comes away easily from the sides of the bowl, it’s ready for the final prove.
4th stage
of proofing: The dough is stretched and folded 6 times:
first 3 times at 15-minute intervals, then 3 times at 30-minute intervals. (In the video I say every 30 minutes, but the first 3 times can be done after just 15 minutes.)
Tip: Make sure you always cover the dough between each fold and leave it to rest at room temperature.
5. Dividing and shaping Place
the dough on a lightly floured surface, divide it into two equal pieces and shape them loosely into rounds. Leave to rest, uncovered, for 30 minutes.
Tip: Letting the dough rest makes it much easier to shape later on.
6. Layering and Final Shaping Gently stretch
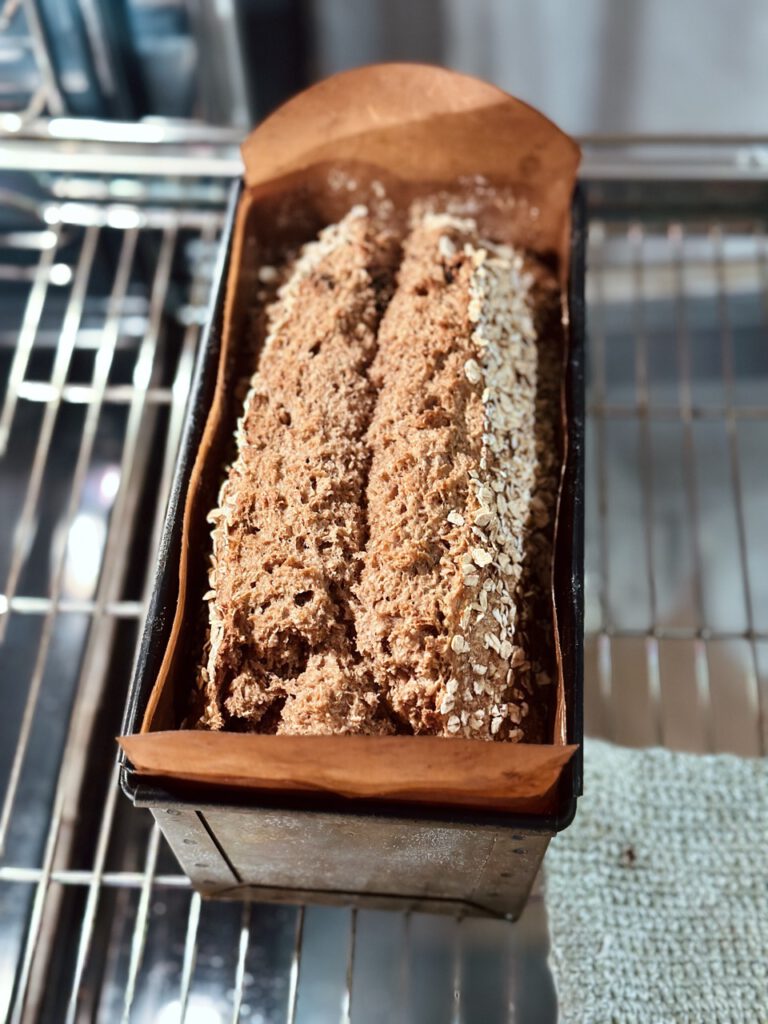
the dough into a rectangle and evenly grate the ice-cold butter over it. Next, fold the bottom third of the dough inwards. Then fold the right-hand side towards the centre and fold the left-hand side over it, so that the butter is completely enclosed. Now roll the dough up from the top, building tension as you go. Press the seam firmly to prevent the butter from escaping. Place the dough in a floured proving basket with the seam side facing upwards.
Tip: Work quickly so that the butter doesn’t melt – this ensures beautifully flaky layers.
7. Final proofing
: Leave the dough pieces to prove in the fridge overnight (at least 12–14 hours).
Cold proofing develops more flavour and produces a better crust.
8. Baking Preheat
the oven to 230°C. Heat a cast-iron pot (e.g. Le Creuset / Dutch oven) for 30 minutes. Remove the dough from the fridge, place it directly into the hot pot, score the surface and bake with the lid on for 20 minutes. Then remove the lid and bake for a further 30 minutes. The bread is ready when the core temperature reaches around 97°C. Leave to cool on a wire rack for at least 2 hours before slicing.
Tip: The bread is ready when it sounds hollow and has reached an internal temperature of 97 °C.
9. Enjoy once cooled
Leave the croissant sourdough bread to cool on a wire rack for at least 2 hours before cutting into it.
Tip: Patience pays off – this keeps the crumb moist and prevents it from crumbling when sliced.
Variations
For even more flavour, you can add a little honey to the dough.
Serving suggestions
Toasted with a little salted butter or honey
Perfect as an accompaniment to cheese platters
Topped with poached eggs or avocado
Frequently Asked Questions
Why does the dough need to stay in the fridge for so long?
The long cold proofing enhances the development of flavour and ensures a stable, oven-ready dough structure.
Can this recipe be made without a cast-iron pot?
Yes, you can use a baking stone or a weighted baking tin – but the crust turns out best in the pot. If you use a baking stone, please place a baking tray lined with baking paper underneath, as some butter will always seep out.
More delicious recipes
Please do feel free to leave me a comment – I always love hearing from you!

You can also find me on Instagram, Facebook, TikTok and YouTube, for a glimpse behind the scenes of my blog.
Recipe card
*As an Amazon Associate, I earn from qualifying purchases. However, the price remains the same for you.
Croissant Sourdough Bread
Ingredients
Equipment
Method
- Make the pre-ferment: Mix all pre-ferment ingredients in a small container and leave to rest at 25°C for 5 hours.
- Autolyse: In a medium bowl, mix the wheat flour, wholegrain flour and 650 g water until no dry patches remain. Cover and rest for 2 hours.
- Mix the main dough: Add 20 g water (less if the dough feels too wet), 17 g salt and the ripe pre-ferment to the bowl. Work in with your fingers, then stretch and fold for 2–3 minutes until the dough is smooth and cohesive. Transfer to a proofing box or large bowl and cover.
- Bulk fermentation: Stretch and fold the dough 6 times in total — 3 times every 15 minutes, then 3 times every 30 minutes.
- Divide and pre-shape: Lightly flour the work surface, turn out the dough and divide into two equal halves. Loosely pre-shape each piece into a round and leave to rest uncovered for 30 minutes.
- Laminate: Gently stretch the dough into a rectangle and grate the ice-cold butter evenly over it. Fold the bottom third up, then fold the right side to the centre and the left side over it. Roll the dough up from the top, building tension as you go. Press the seam firmly to seal in the butter. Place seam-side up in a floured proofing basket.
- Final proof: Cover the proofing baskets and refrigerate overnight for at least 12–14 hours.
- Bake: Preheat the oven to 230°C. Place a cast iron pot (e.g. Le Creuset / Dutch oven) inside and heat for 30 minutes. Remove the dough from the fridge, place directly into the hot pot and score. Bake covered for 20 minutes, then remove the lid and bake for a further 30 minutes. The bread is ready when the internal temperature reaches 97°C.
- Cool: Leave to cool on a wire rack for at least 2 hours before slicing.


Leave a Reply